Let’s be honest, when you think of a science lab, you picture whirring machines, colorful chemicals, and people in white coats. You probably don’t picture a small, square, often overlooked piece of glass or plastic called a cuvette. But if you’ve ever needed to measure how much DNA you’ve extracted, determine the concentration of a protein, or figure out what that mysterious blue compound in your flask is, you’ve almost certainly needed one.
I remember my first time. I was a sophomore in college, holding a pristine, expensive quartz cuvette for a UV-Vis spectrophotometer, my hands suddenly feeling like clumsy clubs. My professor’s voice echoed in my head: “Treat these like they’re made of gold and your data depends on it.” He wasn’t wrong. I’ve since learned—sometimes the hard way—that this tiny “lab window” is one of the most critical, yet most taken-for-granted, tools on the bench. Today, I want to pull back the curtain on cuvettes. We’ll talk about what they are, why the material matters immensely, how to use them without wanting to scream, and how to care for them so they don’t drain your lab’s budget.
So, What Exactly Is a Cuvette?
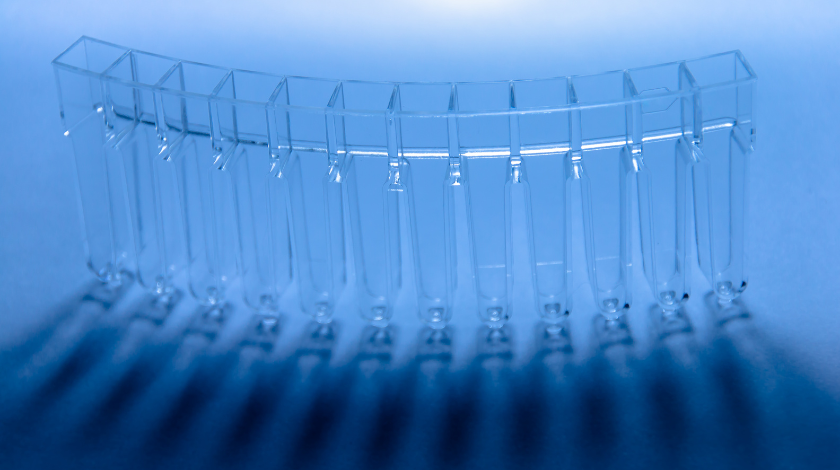
In the simplest terms, a cuvette is a small, rectangular container designed to hold liquid samples for analysis by a light beam. Think of it as a super-precise, optical-grade test tube. But unlike a round test tube that would scatter light in all directions, a cuvette has two perfectly parallel, optical-grade windows. This allows a beam of light from an instrument like a spectrophotometer or colorimeter to pass straight through your sample in a controlled, predictable way.
The instrument then measures how much light is absorbed by your solution. This simple act—measuring light absorption—is the backbone of quantifying practically anything in molecular biology, chemistry, and environmental science. That little square is literally the gateway through which we “see” the concentration of our world. Without a proper cuvette, that data is just guesswork.
The Great Material Debate: Glass, Plastic, or Quartz?
This is where most beginners get tripped up, and it’s the most important decision you’ll make. You can’t just grab any cuvette. The material must be chosen based on the wavelength of light you’re using. Get it wrong, and your cuvette might block the light entirely, giving you a useless reading.
-
Optical Glass Cuvettes: These are your standard, workhorse cuvettes for the visible light spectrum (about 340 nm to 1000 nm). They’re relatively inexpensive, durable against scratches compared to plastic, and can be reused many times with proper cleaning. Need to run a Bradford assay (that blue protein test) at 595 nm? A glass cuvette is perfect. They’re great for teaching labs and general colorimetric assays.
-
Quartz Cuvettes (often called UV Cuvettes): Here’s the premium option. Quartz (or fused silica) is transparent to a much wider range of light, including ultraviolet (UV) light down to about 190 nm. This is absolutely essential for techniques like measuring DNA or RNA concentration (which absorb at 260 nm) or looking at many aromatic compounds. If your experiment involves UV light, you must use quartz. They are significantly more expensive and more fragile than glass, which is why my professor gave me that stern warning. A good rule of thumb: if your spectrophotometer has a “UV” in its name, you likely need a quartz cuvette.
-
Plastic Cuvettes (Polystyrene or PMMA): These are the disposable, convenient option. They’re incredibly cheap, pre-sterilized, and perfect for applications where cross-contamination is a huge concern—think diagnostic labs or quick classroom experiments. However, they only work well in the visible range, can easily be scratched (which ruins the optical path), and are not suitable for organic solvents, which can melt them. I use these when I’m screening dozens of samples and just need a rough idea of concentration.
How to Use a Cuvette Without Losing Your Mind
Using a cuvette seems straightforward until you get a weird, inconsistent result. Here’s the right way, born from many, many mistakes.
First, handling. Always hold the cuvette by its frosted, textured sides. Your fingers are covered in oils, salts, and DNA. If you touch the smooth, clear optical windows, you will leave smudges that scatter light and ruin your absorbance reading. It’s the cardinal sin of cuvette use.
Second, filling it. Your sample doesn’t need to fill the whole chamber. You just need enough liquid so that the light beam passes completely through the sample, not through air above it. Usually, a fill volume of about 3/4 of the height is safe. But here’s a pro tip: always overfill it slightly, then cap it with a Parafilm or a special cuvette lid, and gently invert it to check for bubbles. Tiny air bubbles clinging to the windows act like little lenses and can cause massive errors. Tapping the cuvette gently on the bench usually dislodges them.
Third, orientation. This one is subtle but crucial. Cuvettes are not always perfect cubes. One pair of opposite sides is the premium, optical-grade window. The other pair might be of slightly lower quality. Most cuvettes have a marking (like a white dot or a frosted stripe on the top rim) on one side. Always place the cuvette in the instrument holder with this marked side facing the direction of the light beam. This ensures the light travels through the best-quality windows every single time, giving you consistent data.
The Art and Science of Cleaning
A dirty cuvette is a useless cuvette. Residue from a previous experiment will absorb light and give you a false reading for your new, precious sample. Your cleaning method depends on what was in it.
For most aqueous solutions (salts, sugars, buffers), a thorough rinse with distilled or deionized water, followed by a final rinse with the solvent of your next sample, is sufficient. Rinse at least three times. For stubborn stains like dyes (think the strong blue from a Coomassie stain), I make a weak HCl and ethanol cleaning solution. A few hours soaking in that, followed by copious rinsing, usually does the trick. For proteins or lipids, a mild detergent soak can help.
The golden rule: Never use abrasive brushes or scouring pads on the optical windows. Use only soft tissues or cotton swabs, and be gentle. A scratched cuvette is a permanently damaged cuvette. After cleaning, I always air-dry them upside down on a clean tissue in a dust-free place. Storing them wet in a box is asking for mold and water spots.
When to Say Goodbye
Even with perfect care, cuvettes don’t last forever. Inspect them by holding them up to the light. Do you see fine scratches, chips, or cloudiness on the windows? If so, it’s time to retire them. A scratched cuvette will scatter light, leading to abnormally high and unstable absorbance readings. Continuing to use it is a waste of good reagents and your time. For disposable plastics, the moment you see a scratch or after a single use with a contaminant, toss it. That’s what they’re for.
Wrapping It Up
The humble cuvette is a perfect example of a tool that’s easy to use but hard to master. By understanding its purpose, choosing the right material for your light, handling it with deliberate care, and cleaning it thoughtfully, you transform it from a simple container into a reliable partner in your scientific work. Good data starts with a good foundation, and in spectroscopy, that foundation is a clear, clean, and correct cuvette. It’s a small habit that separates a sloppy experiment from a rigorous one. So next time you pick one up, give it a little respect—it’s the window to your results.
Conclusion
Mastering the use of the cuvette is a fundamental skill in any lab that relies on light-based measurements. It goes beyond just pouring liquid into a container; it involves a mindful understanding of materials, a disciplined approach to handling, and a commitment to maintenance. Investing time in learning these details—matching quartz to UV work, religiously avoiding fingerprints, and developing a solid cleaning routine—pays enormous dividends. It saves money by extending the life of expensive quartz cells, but more importantly, it safeguards the integrity of your data. In science, accuracy is everything, and it often flows through the clear, parallel windows of a well-chosen, well-cared-for cuvette. Start treating it with the importance it deserves, and you’ll immediately see the difference in the consistency and reliability of your readings.
Frequently Asked Questions (FAQ)
Q: Can I use a glass cuvette for UV light measurements at 260 nm?
A: Absolutely not. Standard optical glass absorbs UV light, so at 260 nm, your reading would be off the charts because the glass itself is blocking all the light. You must use a quartz cuvette for any measurement below about 340 nm.
Q: How do I know which side of the cuvette faces the light?
A: Look for a marking on the top rim of the cuvette. It is often a frosted stripe, a white painted line, or a small etched arrow. This marked side should always be aligned to face the light source in the instrument. If there’s no marking, assume the two clear, perfectly smooth sides are the optical windows.
Q: Is it okay to reuse disposable plastic cuvettes?
A: Technically, you can if you clean them very well, but it’s not recommended. They scratch easily, which affects optical clarity, and they are porous, making it hard to remove all traces of certain dyes or contaminants. Their primary advantage is being sterile and uncontaminated for single use. For consistent, quantitative work, reusable glass or quartz is better.
Q: My cuvette has a small scratch. Is it ruined?
A: It depends on the severity and location. A tiny scratch on the side or top may not be in the light path. But if you can see a scratch when you hold it up and look through the optical windows toward a light, it will scatter light and affect your readings. For critical work, it’s best to err on the side of caution and replace it.
Q: What should I clean my cuvette with if I used a strong acid?
A: The best practice is to immediately rinse it with copious amounts of water to dilute and remove the acid. Do not let strong acids (or bases) sit in a cuvette, especially quartz, for extended periods. After thorough water rinsing, you can proceed with a normal cleaning routine. Always check if your cuvette material is chemically resistant to what you’re using.